In this chapter you will learn how to set parameter values of the vacuum monitoring system.
Chapter contents:
1
Vacuum monitoring
2
Setting the vacuum levels
3
Selection of monitored packages
4
Determining the vacuum empty level of an empty tool
5
Determining the corrective vacuum level offset for Advantage/MP1260.1
6
Determining the corrective vacuum level offset for MX
See also: package vacuum monitoring; component pick-up scheme MX
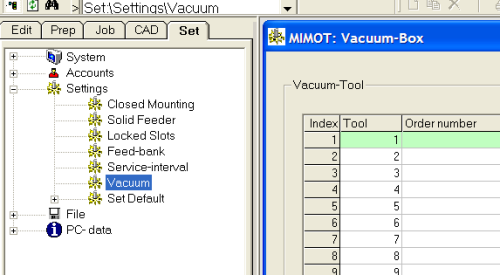
Using the vacuum box you can define the levels for each tool. You can edit the "vacuum empty" level (no component at the tool), the "vacuum tolerance" of the empty value and the vacuum limit, a minimum vacuum difference threshold. You can activate/de-activate vacuum monitoring for each tool type. Click the confirmation button to save your changes.
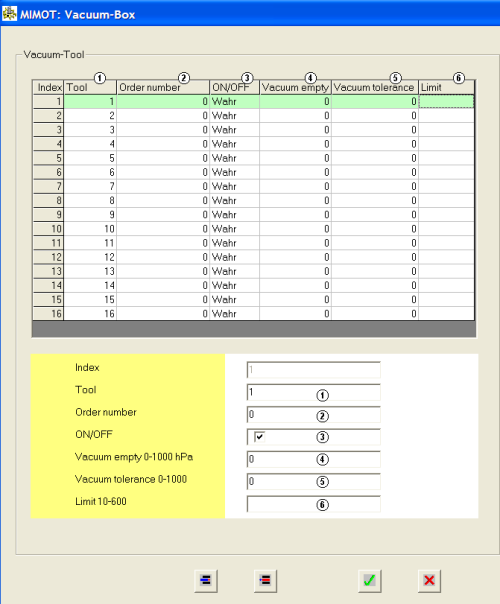
| No. | Parameter | Format/max. character count | Comment |
| 1 | Tool | xx | Number of the tool |
| 2 | Order number | xxxxxx | Order number of the tool |
| 3 | On/Off | Check to activate | Activate/de-activate vacuum monitoring for the selected tool |
| 4 | Vacuum empty | xxx | Residual pressure value [hPa] for the tool with no component sucked (see also "Determining the vacuum level of an empty tool") further down |
| 5 | Vacuum tolerance | xxx | Tolerance of the "vacuum empty" parameter for the selected tool (standard: 150; max. 250) |
| 6 | Limit | xxx | Difference between vacuum levels with/without a component at the tool. The MX machine uses this value to check whether a component is sucked at the tool, before the needle moves up. (Tool dependant, standard: 30) |
Selection of monitored packages
In the right area of the window you will find the "Selection-Package" list. In this list you can check/uncheck vacuum monitoring for each package. Confirm you selection by clicking the "Set" button.

Determining the vacuum empty level of an empty tool
Advantage:
Install the tool at a needle, e.g. front head, needle 1.
With the following sequence of buttons to get to the "air/vacuum" menu:
 ->
-> ->
-> ->
-> ->
-> ->
->
Click (1) to switch on vacuum. The manometer reading gives the residual pressure. Subtract the result (2) from 1,000 hPa (ambient pressure) to get the vacuum empty value of the tool (e.g. Subtract the reading of 450 hPa from 1,000 hPa to get the vacuum empty value of 550 hPa).
Repeat this procedure with several tools of the same type and enter the mean value as vacuum empty value in MIMExplorer.

MX:
Install the tool at a needle, e.g. left head, needle 1.
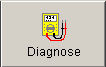
Open the diagnosis window.
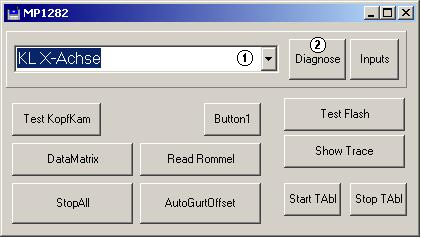
Select left head, needle 1 from the drop down list (1), then click "Diagnosis" (2). The following diagnosis windows opens:
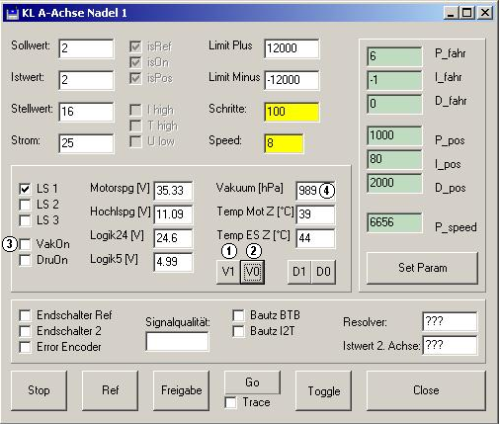
Open the vacuum valve by clicking the V1 button (1). The valve's status is indicated by the check box VakOn (3) (checked if on). The residual pressure is shown in the vacuum field (4). As with the Advantage machine you must subtract this result from 1,000 hPa (ambient pressure) to get the vacuum empty value. You can switch off the vacuum valve by clicking the V0 button (2).
Repeat this procedure with several tools of the same type and enter the mean value as vacuum empty value in MIMExplorer.
Determining the corrective vacuum level offset for Advantage/MP1260.1
Use the following procedure to set up the corrective offset value for the vacuum monitoring:
Drop all components from all needles to make sure that all vacuum valves are closed. Remove all tools from the needles.
To do so, click  , then
  , and finally
  .
.
The following window opens:
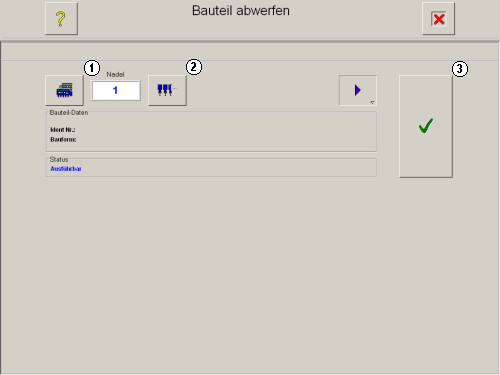
Click (1) to choose the head. Select all needles of the head and confirm clicking (3). Repeat the procedure for the second head.
To enter the diagnosis menu for the first needle of the front head click
, then , then , then , then , and finally .
In the diagnosis menu click (1) to switch on the vacuum valve.
The reading (2) should show a residual pressure of about 800 hPa. If not, corrective values must be entered in masch.ini.
Masch.ini contains the following parameter:
; Offsets for vacuum monitoring Referenzwert = 800
[maschine]
NVacCal1V>=800,800,800,800,800,800
NVacCal2V>=350,350,350,350,350,350
NVacCal1H=800,800,800,800,800,800
NVacCal2H=350,350,350,350,350,350
; KorrVakNV=0,0,0,0,0 ; alte Kalibriermethode nicht mehr verwenden
; KorrVakNH=0,0,0,0,0 ; alte Kalibriermethode nicht mehr verwenden
Corrective offset values are determined like for the MX machine. For each needle you must measure the residual pressure without a tool and with the 0402 tool (tool 111421 proAlpha101504). Enter these values in lines NVacCal1V and NVacCal2V resp. for the front head and in lines NVacCal1H and NVacCal2H resp. for the rear head.
KorrVakNV is related to the needles of the front head, KorrVakNH is related to the rear head. Parameter values are comma separated. If e.g. needle 1 of the front head reads 823 hPa residual pressure, the associated KorrVak value must be set to -23 hPa (823 hPa - 23 hPa = 800 hPa). A reading of 754 hPa residual pressure requires a KorrVak value of +46 hPa in the masch.ini. Repeat the procedure for both heads and all needles. Once all values are entered in masch.ini, you must restart the system software.
Determining the corrective vacuum level offset for MX
Use the following procedure to set up the corrective offset value for the vacuum monitoring:
Drop all components from all needles to make sure that all vacuum valves are closed. Remove all tools from the needles.
To do so, click , then , and finally .
The following window opens:
Select the head (1) and all buttons of that head (2) and confirm (3). Repeat for the second head.
Open the diagnosis window before you start the reference run.
Select left head, needle 1 from the drop down list (1), then click "Diagnosis" (2). The following diagnosis windows opens:
Open the vacuum valve by clicking the V1 button (1). The valve's status is indicated by the check box VakOn (3) (checked if on). The residual pressure is shown in the vacuum field (4). Enter that value in line NVacCal1 of masch.ini. Then install a a 0402 tool (tool 111421 proAlpha101504) at the needle and re-read the residual pressure. Enter that value in line NVacCal2 of masch.ini. These two parameters - needle empty value, and tool empty value - must be determined for every needle of each head. Enter them in masch.ini. Note: Don't forget to switch off vacuum by clicking V0 (2).
In masch.ini you will find the entries for NVacCal1 und NVacCal2 in the sections [KopfLinks] and [:
[KopfLinks]
Vorh=1
NadelnVorh=1,1,1,1 ;N1,N2,N3,N4
NVacCal1=778,809,784,800
NVacCal2=450,454,456,468
MessMNP=0 ;1=Maschinennullpunkt im Ablauf vermessen
DropX=-597.23
DropY=489.93
OpticsFront=4 ;Optik auf vorderer Maschinenseite: 0=keine, 2=2fach, 4=4fach
OpticsRear=4 ;Optik auf hinterer Maschinenseite: 0=keine, 2=2fach, 4=4fach
TypYAchse=1 ;0=Stahlseil
;1=Flachriemen
TypXAchse=1 ;0=Stahlseil
;1=Flachriemen
TraystationAllowed=0
[KopfRechts]
Vorh=1
NadelnVorh=1,1,1,1 ;N1,N2,N3,N4
NVacCal1=710,735,729,757
NVacCal2=437,443,448,400
MessMNP=0 ;1=Maschinennullpunkt im Ablauf vermessen
DropX=600.09
DropY=485.09
OpticsFront=4 ;Optik auf vorderer Maschinenseite: 0=keine, 2=2fach, 4=4fach
OpticsRear=2 ;Optik auf hinterer Maschinenseite: 0=keine, 2=2fach, 4=4fach
TypYAchse=1 ;0=Stahlseil
;1=Flachriemen
TypXAchse=1 ;0=Stahlseil
;1=Flachriemen
TraystationAllowed=1
NVacCal1 contains needle empty values and NVacCal2 contains the tool empty values. Parameter sequence is from left to right, e.g. starting with needle 1.
Now re-start the machine software and start the reference run. Check the residual pressure values in the diagnosis menu. The needle empty value should be close to 800 hPa and the tool empty value close to 350 hPa.